Animated Weather Widget
Enhance your WordPress site with a sleek, modern weather widget powered by the OpenWeatherMap API and animated Meteocons icons.
Plugin info
Maintenance & Compatibility
Maintenance score
Possibly abandoned • Last updated 415 days ago
Is Animated Weather Widget abandoned?
Possibly abandoned (last update 415 days ago).
Compatibility
Similar & Alternatives
Explore plugins with similar tags, and compare key metrics like downloads, ratings, updates, support, and WP/PHP compatibility.
Description
Enhance your WordPress site with a sleek, modern weather widget powered by the OpenWeatherMap API and animated Meteocons icons. This lightweight and easy-to-use plugin allows you to display real-time weather conditions for any location with a clean, customizable design. Perfect for adding a touch of functionality and style to your website, the plugin offers just the right amount of settings to tailor the widget to fit seamlessly into your site\’s aesthetic. Stay weather-savvy with this simple yet attractive solution!
Installation
Log in to Your WordPress Dashboard:
Access your WordPress admin panel by navigating to yoursite.com/wp-admin and entering your login credentials.
Navigate to the Plugins Section:
In the left-hand menu, click on Plugins > Add New.
Search for the Plugin:
Use the search bar in the top right corner to search for the plugin by name (e.g., \”Animated Weather Widget by abrandaocom\”).
Install the Plugin:
Once you find the plugin in the search results, click the Install Now button next to the plugin name.
WordPress will automatically download and install the plugin for you.
Activate the Plugin:
After installation, click the Activate button that appears in place of the \”Install Now\” button.
This will enable the plugin on your site.
Configure the Plugin (if required):
Go to Settings > Weather Widget (or the relevant menu item) in your WordPress dashboard.
Enter your OpenWeatherMap API key (sign up at OpenWeatherMap if you don’t have one).
Customize the widget settings, such as location, units (Celsius/Fahrenheit), and display options.
Add the Plugin to Your Site:
Depending on the plugin, you may need to add it to a widget area, shortcode, or block editor:
For widgets, go to Appearance > Widgets and drag the plugin’s widget to your desired location.
For shortcodes, copy the provided shortcode and paste it into a page or post.
For block editor (Gutenberg) plugins, search for the plugin’s block in the editor and add it to your content.
Test the Plugin:
Visit your website to ensure the plugin is working as expected.
That’s it! Your plugin is now installed, activated, and ready to use. For further assistance, refer to the plugin’s documentation or support page.
Frequently Asked Questions
Review feed
Screenshots
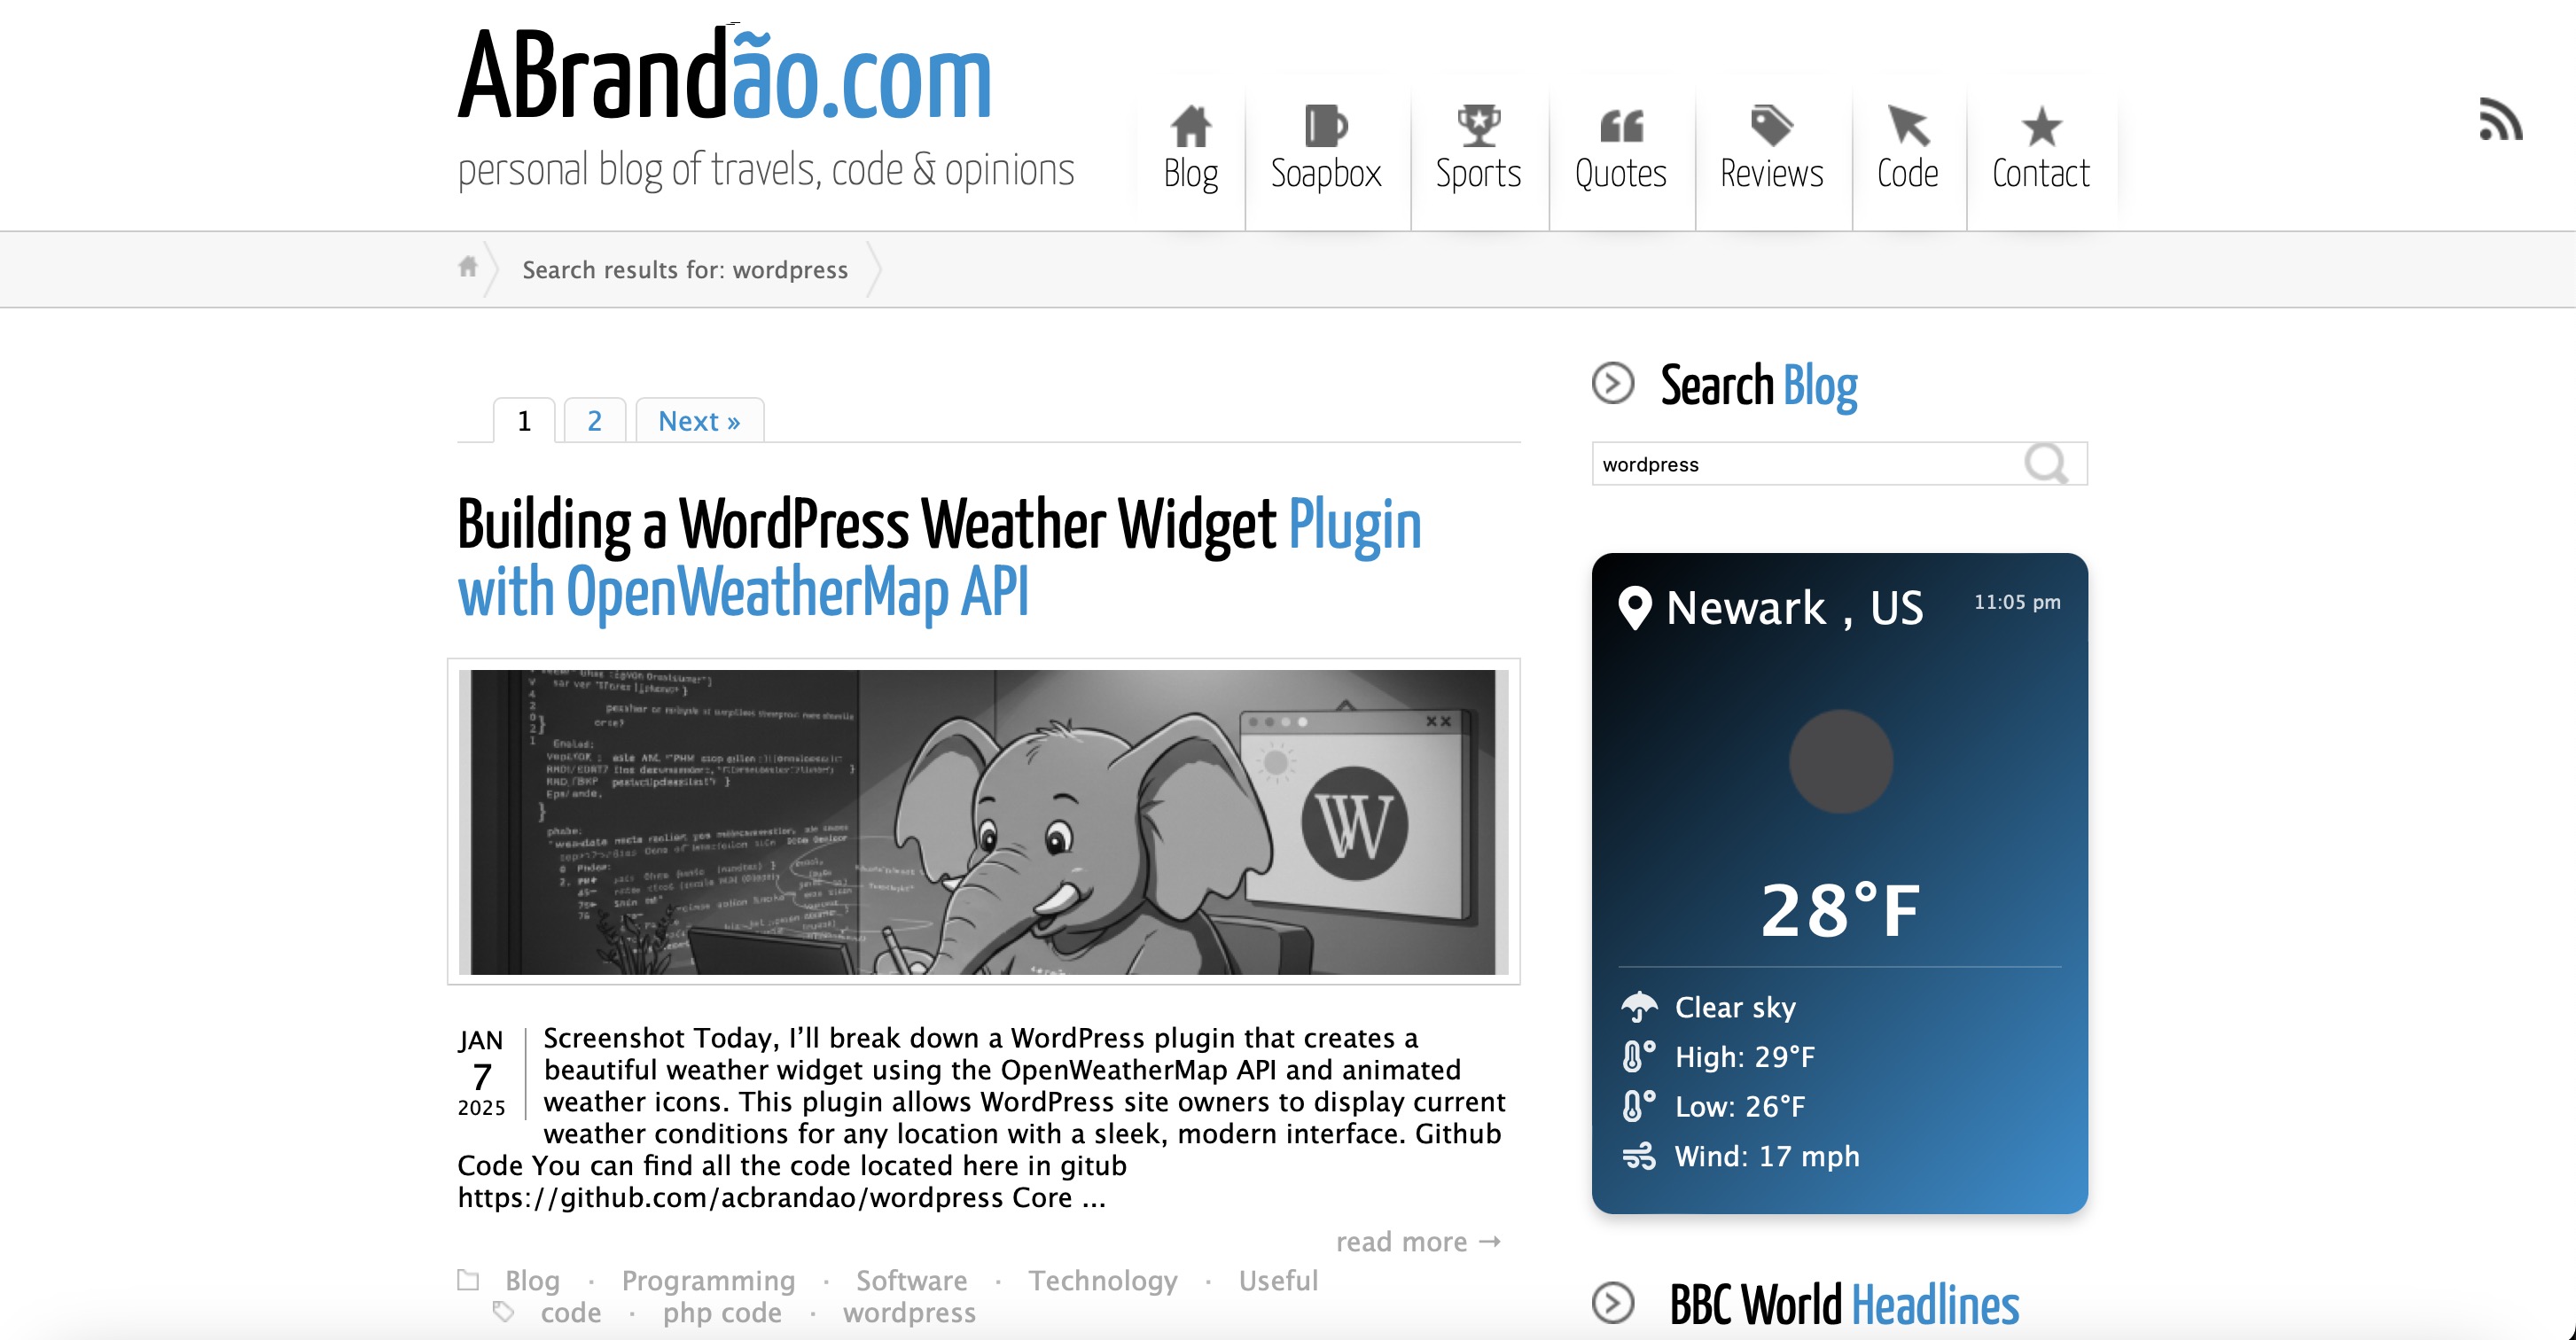
sample of plugin on sidebar
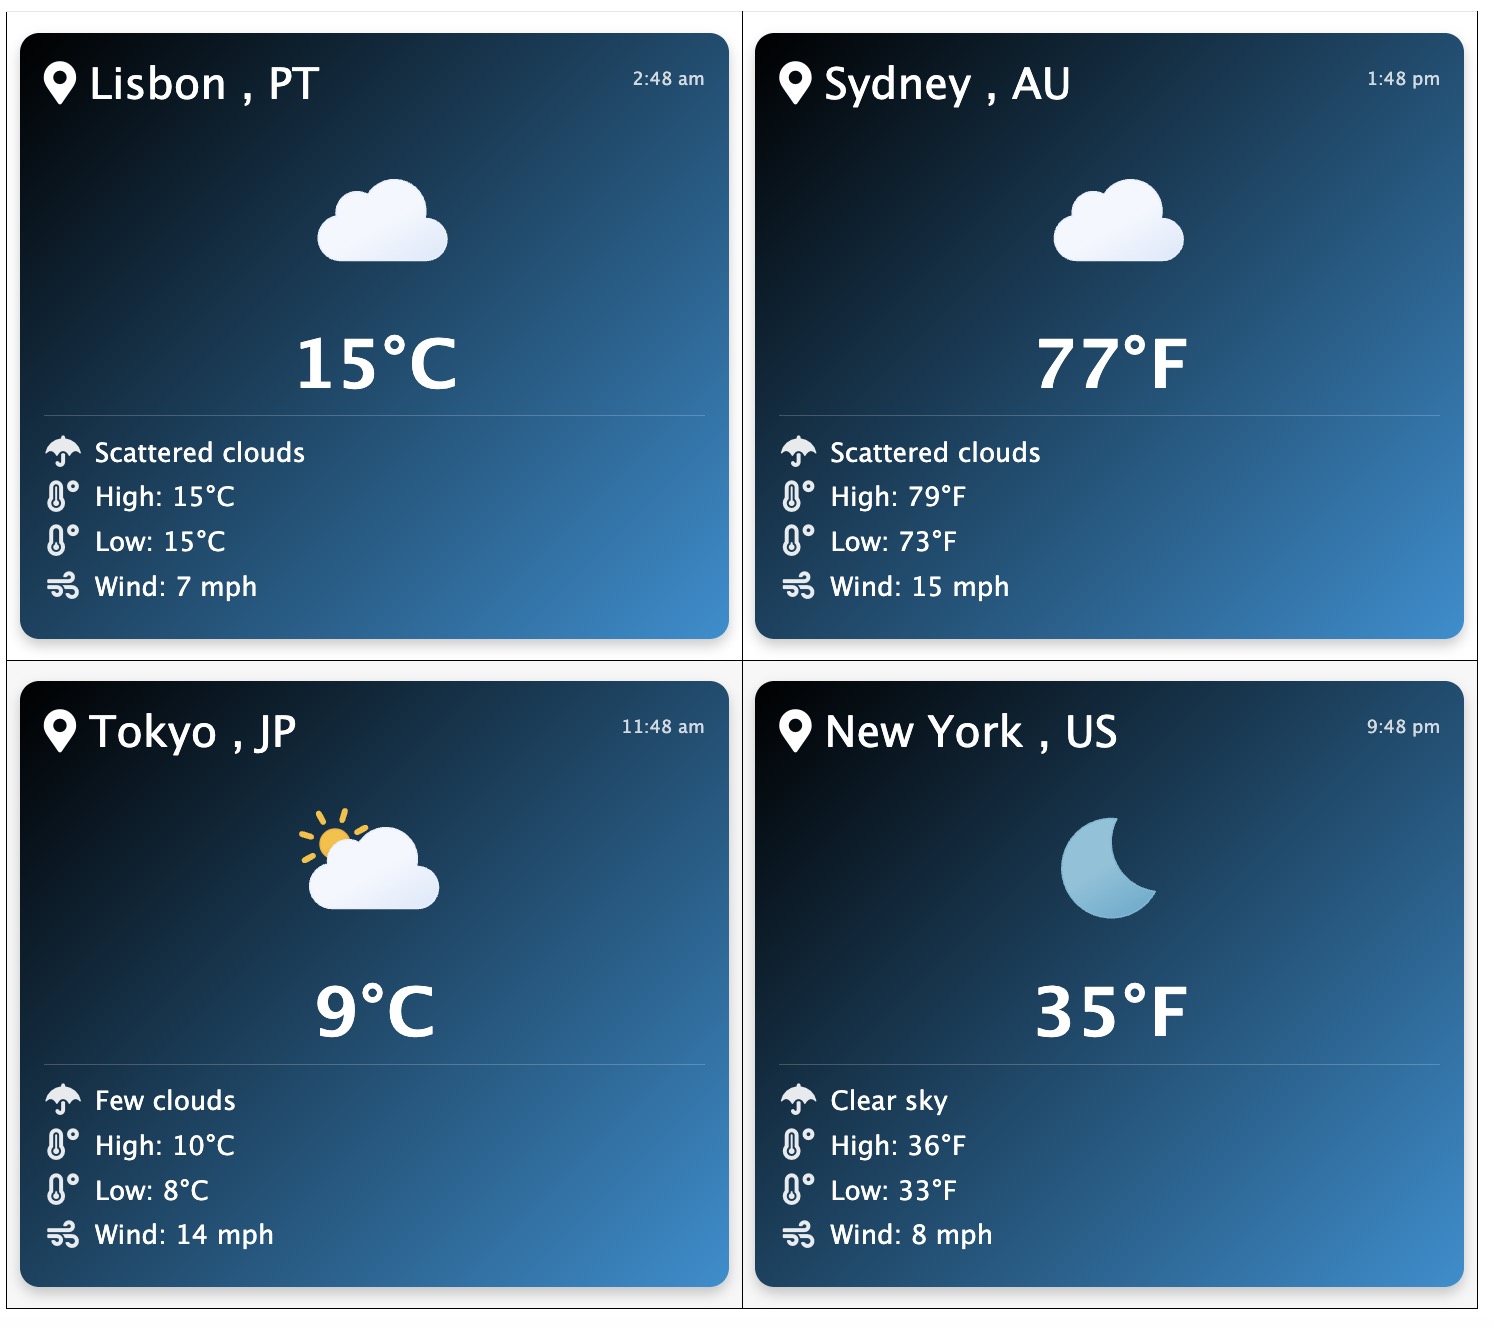
Sample of multiple weather softcodes