Zag Warranty Manager
Manage WooCommerce product warranties, from setting periods to handling claims. Customers track status, expiry, and submit claims via their account.
Plugin info
Maintenance & Compatibility
Maintenance score
Maintained • Last updated 135 days ago
Is Zag Warranty Manager abandoned?
Likely maintained (last update 135 days ago).
Compatibility
Similar & Alternatives
Explore plugins with similar tags, and compare key metrics like downloads, ratings, updates, support, and WP/PHP compatibility.
Description
Meet Zag Warranty Manager. All-in-one warranty management solution for WooCommerce stores worldwide. Streamline your post-sale support with this powerful plugin and enhance your customer support. Zag Warranty Manager allows your customers to easily track warranty of purchased products from their account and claim warranty requests, while giving you full control over processing and tracking all from the admin dashboard.
👉 Get Support / Customization / Report Bugs: Official Website
Features
- Set warranty duration (in days) per product
- Start counting from order completion
- Show expiry, status, and days left
- Add “Warranty Status” tab in My Account
- Shortcode
[zag_warranty]for product display
Best For
- E-commerce Store Owners & Admins
- Retailers & Online Merchants
- Customer Service & Returns Departments
- Fulfillment & Logistics Managers
- Product Support Teams
Installation
- Upload
zag-warranty-managerto/wp-content/plugins/. - Activate via Plugins Installed Plugins.
- Edit a product set warranty period in days.
- After order completion, warranty activates automatically.
- Customers view all warranty data under My Account Warranty Status.
Frequently Asked Questions
The Zag Warranty Manager allows you to set a specific warranty duration (in days) for each individual product in your WooCommerce store. Once a customer’s order is completed, the plugin automatically starts the warranty countdown. Customers can then view the warranty status, expiry date, and days remaining directly in their My Account dashboard, streamlining post-sale support for both you and your buyers.
Yes, absolutely. Zag Warranty Manager automatically adds a new “Warranty Status” tab to the customer’s My Account section. From this central dashboard, your customers can instantly see all their purchased products, the warranty period set, the activation date, the expiry date, and the number of days left on the warranty.
Setting up a warranty is very straightforward. After installing and activating the plugin, simply edit any product in your WooCommerce catalog. Within the product settings, you will find a dedicated field where you can input the desired warranty period in days. The warranty will then automatically be assigned to any new order for that product upon order completion.
The warranty period for a purchased product officially begins and the countdown starts automatically from the moment the customer’s order is marked as ‘completed’ in WooCommerce. This ensures a consistent and traceable start date for all warranty calculations.
Yes, there is! You can use the shortcode [zag_warranty] to display relevant warranty information on any product page, post, or custom area of your site. This allows you to clearly communicate the warranty terms to potential buyers before they make a purchase.
Review feed
Screenshots
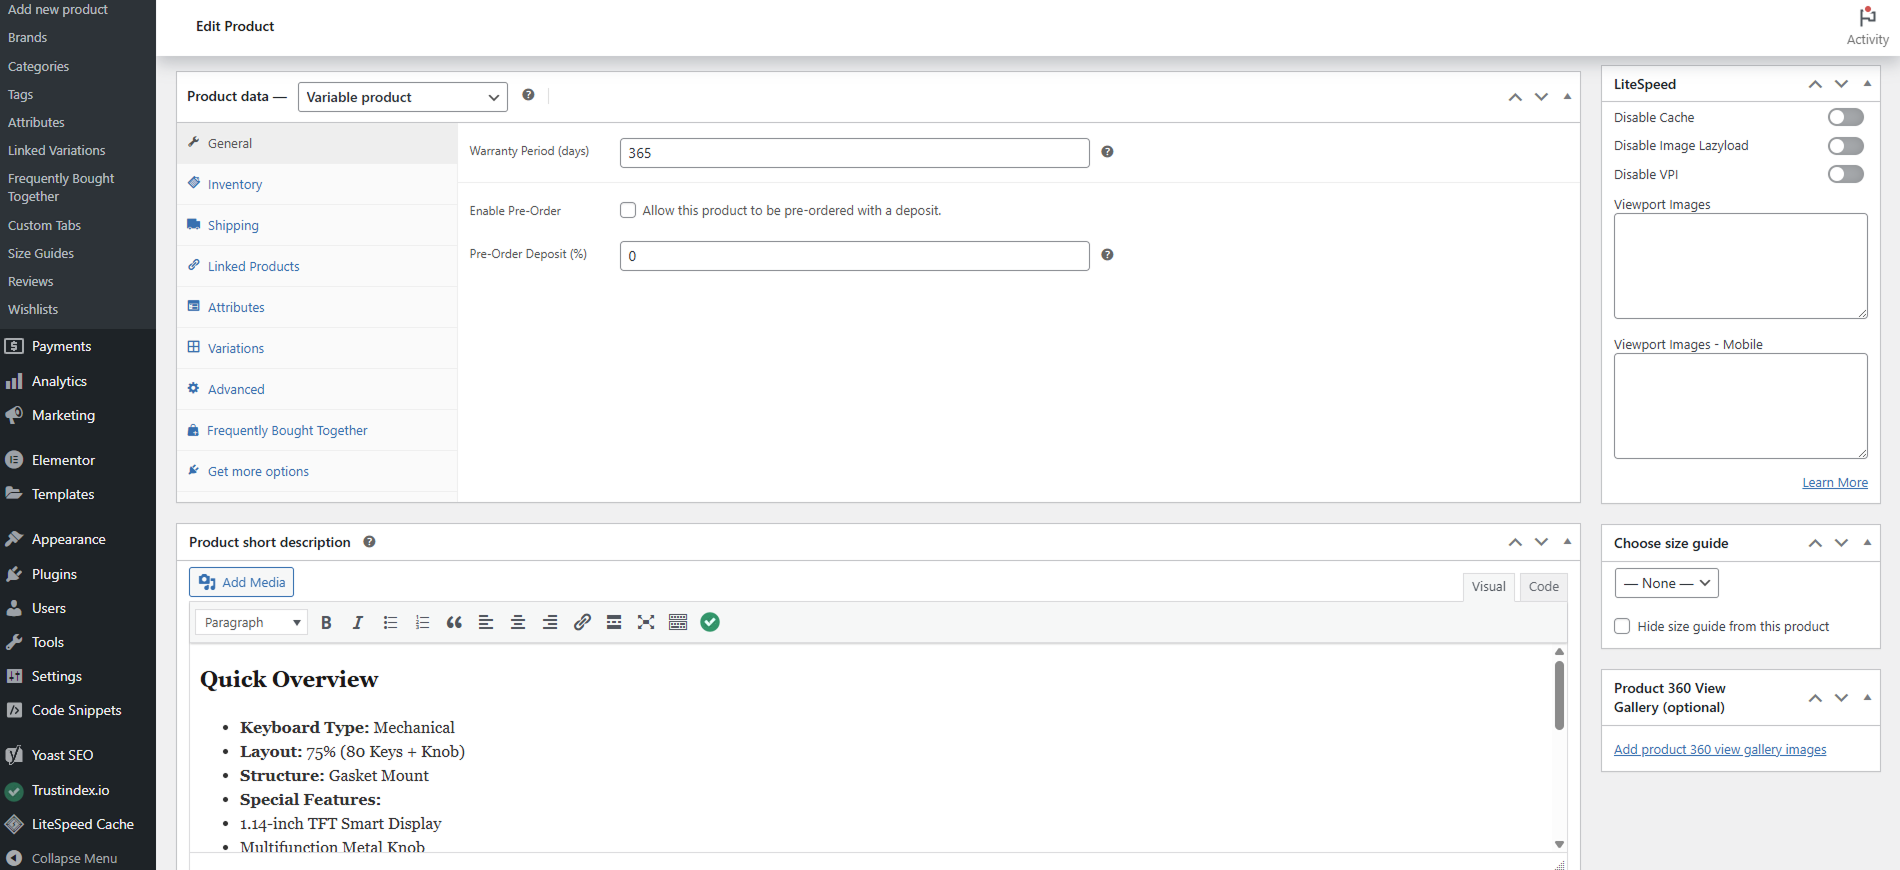
Assign warranty period (days) on product
![Use Shortcode [zag_warranty] on Single Product Page template / Product Description](https://ps.w.org/zag-warranty-manager/assets/screenshot-2.png?rev=3397884)
Use Shortcode [zag_warranty] on Single Product Page template / Product Description
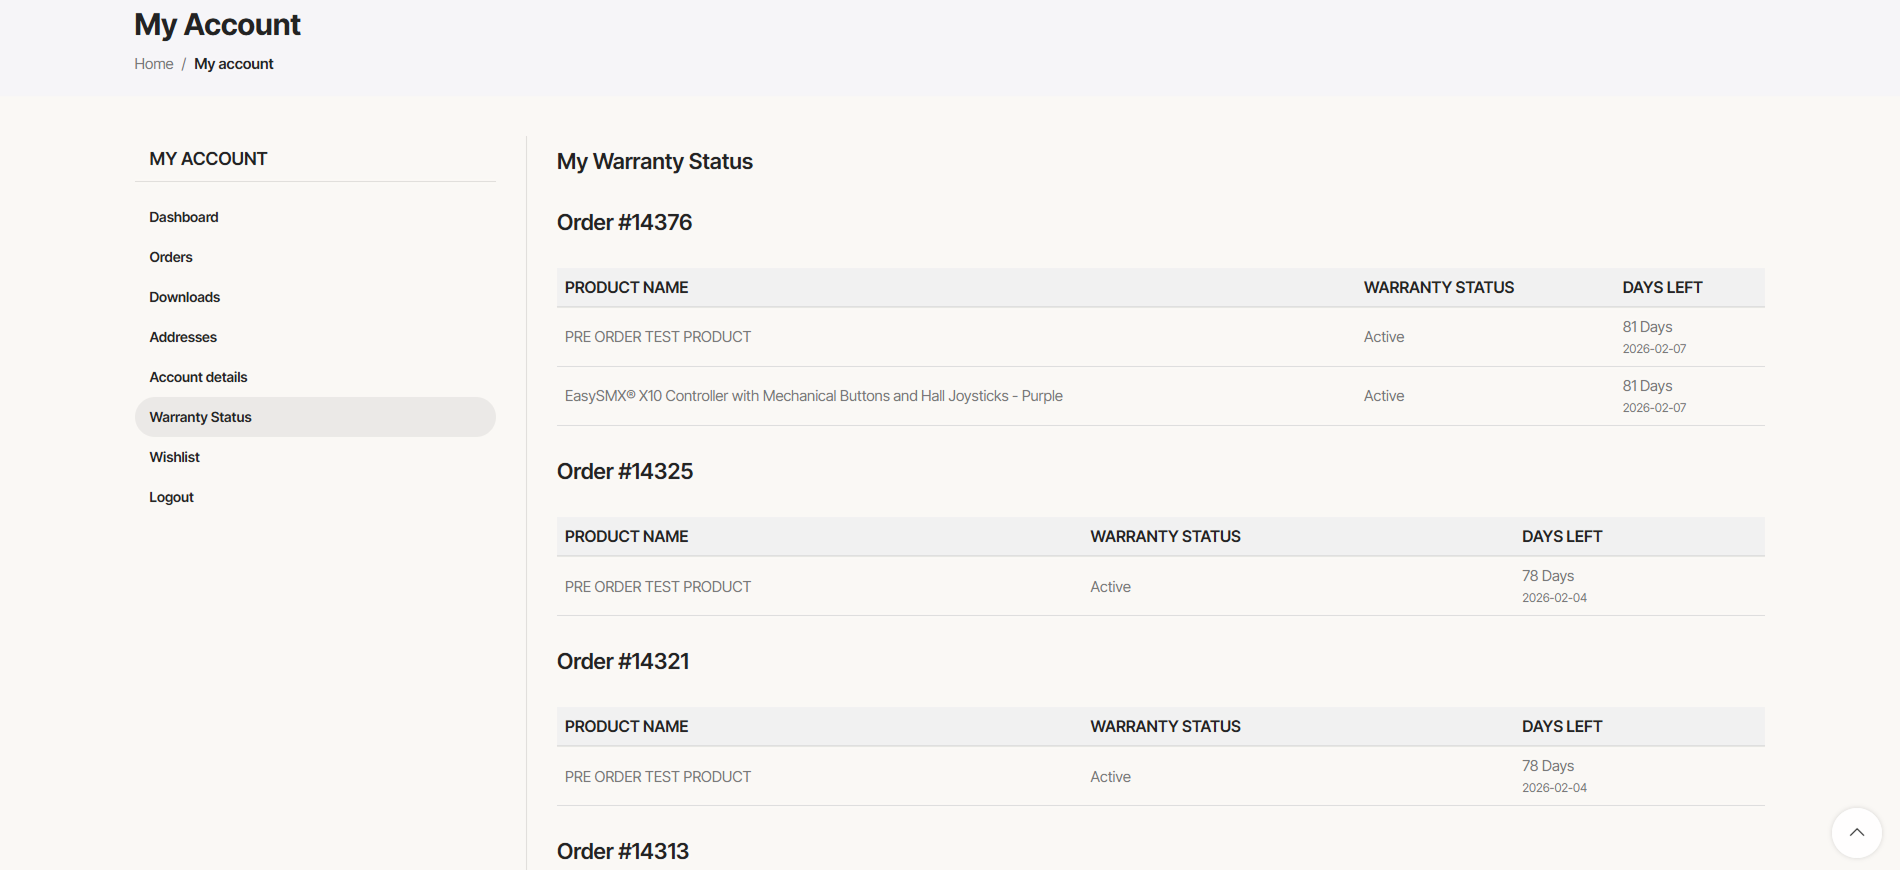
Warranty Status tab under My Account to track warranties of items purchased
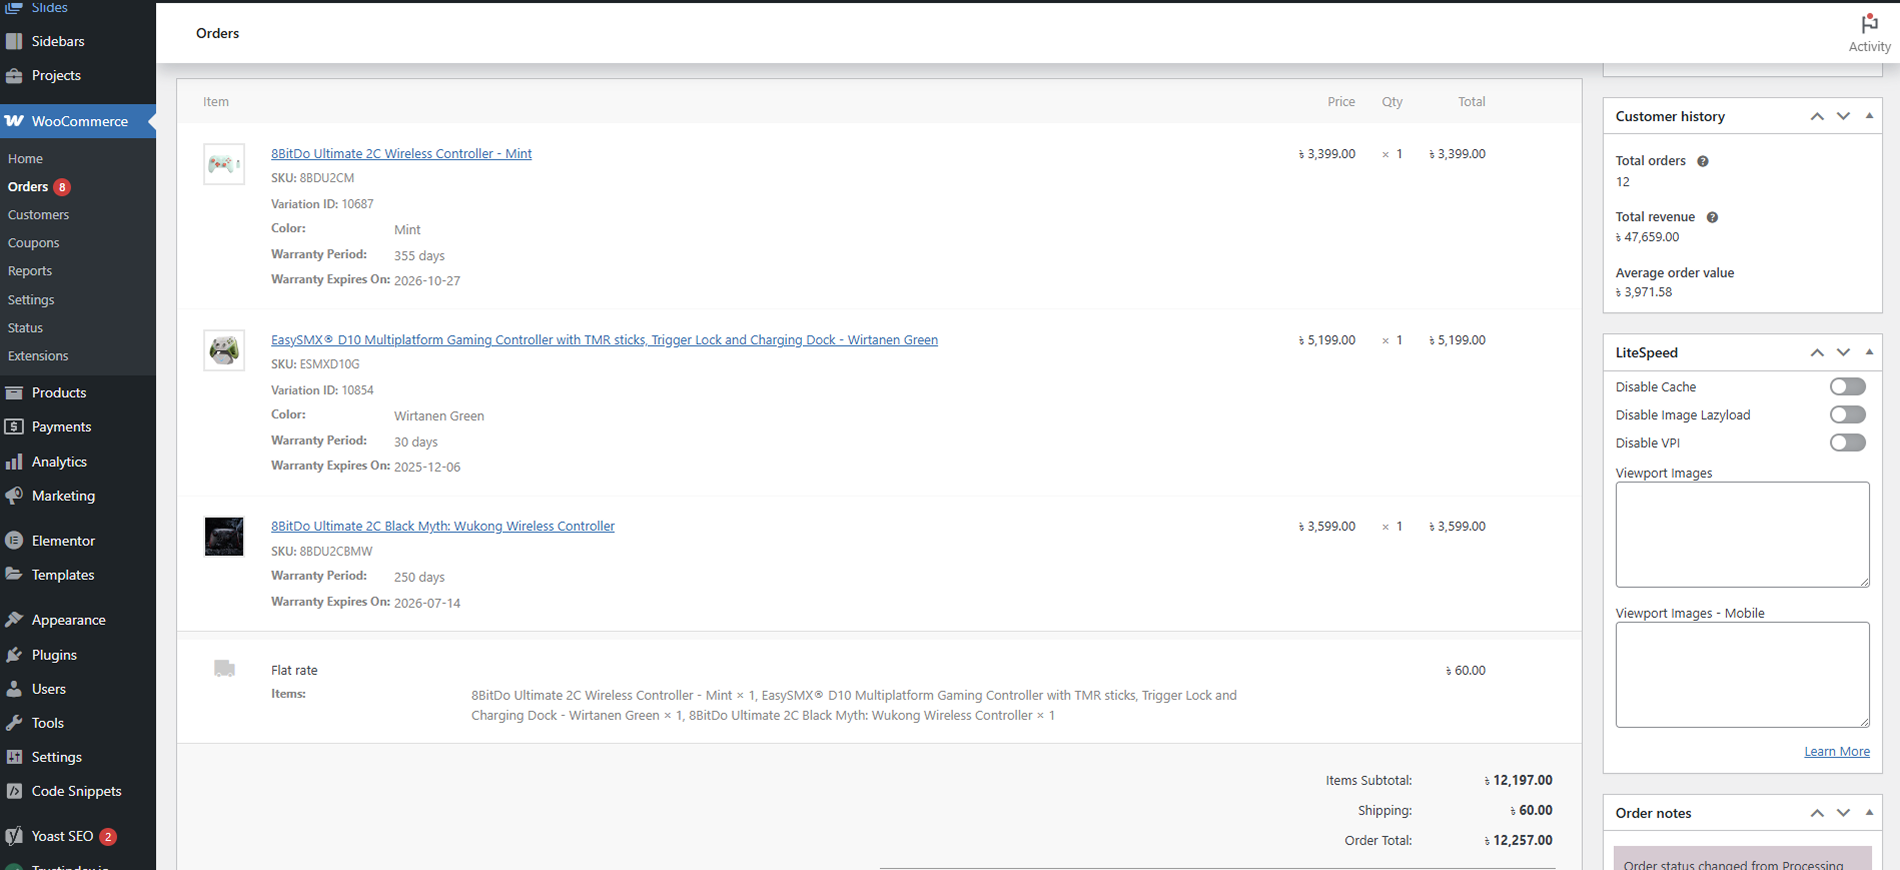
Track warranty from WooCommerce order page of individual customers
Changelog
1.3.3 (Nov 19, 2026)
- UI Fix on My Warranty Status Page.
- Show
No Warrantyon 0 Days or not warranty period assigned products.
1.3.2 (Nov 18, 2026)
- Hello World!